scrapbooking
preserving family memories
By Deborah K. Millemaci
(return to genealogy)
 Old family photographs stored in boxes, greeting cards commemorating
special occasions, newspaper and magazine articles, certificates awarded for
outstanding achievement, old letters, and special handed-down mementos are
only a few of the items used to create Memory Scrapbooks. This hobby is fast
becoming a popular way to preserve family memories, but there are a few
things you need to familiarize yourself with before beginning your book.
Old family photographs stored in boxes, greeting cards commemorating
special occasions, newspaper and magazine articles, certificates awarded for
outstanding achievement, old letters, and special handed-down mementos are
only a few of the items used to create Memory Scrapbooks. This hobby is fast
becoming a popular way to preserve family memories, but there are a few
things you need to familiarize yourself with before beginning your book.
Organize
The best place to begin is with the boxes of photographs you have stored
in
the back of those closets or drawers. These should be organized for easy
access when you need them. An easy way to accomplish this would be to sort
your most recent photos first and then work back to your older pictures. You
can also arrange them into specific categories (such as special events,
birthdays, anniversaries, etc.) by using index cards or index dividers, and
try to date and title your photos whenever possible. If you have a lot of
negatives don�t store them with your photographs; store them separately.
Don�t forget to file any double photos you may have taken...these can be used
another time. If you remember any little antedotes or stories surrounding any
of your photos, write them down and file them also as they can be added later
as part of your Memory Book. This is a time-consuming process, but you will
find your project will be easier to formulate with a little organization.
Select
Your next step will be to select photographs you will use as a theme
(birthday, anniversary, graduation, family reunion, etc.) for your scrapbook
pages.
Supplies
You will need the following supplies to construct your book:
- acid-free photo albums
- sheet protectors
- glue pens and sticks
- photo corners (like the ones you see in old photo albums)
- pens that resist fading
- scissors and decorative scissors (optional) als known as pinking shears that cut zig-zags
- magazines (optional)
- decorative theme papers with coordinating
colors
It is important to remember to use
acid-free
products in order to protect your photos and work from being damaged.
Selection of your background paper will add texture your photos.
Patterns in
almost every type of subject imaginable can be found in most office supply or
craft stores, or be creative and design your own. Once you have decided on
your background, choose a solid complementary color that will blend with the
themed pattern chosen.
Cutting or "cropping" photographs will let you have more pictures on each
page while at the same time ridding you of unnecessary background space.
What is
 great about this technique is that you can be creative in your cutting by
using shapes such as oval, round, and hearts to add depth to your pictures. I
remember when I was younger using pinking shears to add a "decorative border"
to old pictures. Only thing was my father, who was an avid photographer, was
not amused that I tried to improve upon his work... Before cropping your
photographs, make sure you won�t be removing something that will add character
to it, such as old buildings, cars etc. It is also a good idea to "matte" your
photos; this can be accomplished by simply gluing your picture to a
solid-color piece of paper and leaving about a 1/4-inch border around it.
Make sure your hands are clean when handling photographs because body oils
can
ruin your pictures.
great about this technique is that you can be creative in your cutting by
using shapes such as oval, round, and hearts to add depth to your pictures. I
remember when I was younger using pinking shears to add a "decorative border"
to old pictures. Only thing was my father, who was an avid photographer, was
not amused that I tried to improve upon his work... Before cropping your
photographs, make sure you won�t be removing something that will add character
to it, such as old buildings, cars etc. It is also a good idea to "matte" your
photos; this can be accomplished by simply gluing your picture to a
solid-color piece of paper and leaving about a 1/4-inch border around it.
Make sure your hands are clean when handling photographs because body oils
can
ruin your pictures.
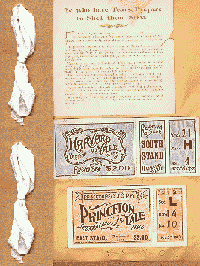
You can further intensify the look of your pages with the use of
stickers,
rubber stamps, pictures from magazines that may relate to the subject of your
book, old letters, family heirlooms (such as a piece of jewelry from your
grandmother), newspaper articles, etc. You can easily take pictures of
family
heirlooms and then use them in your project. Don�t forget that copies of
birth
and death certificates, other legal documents, and even recipes can be used.
Words & more...
Words add substance to any image, and as we all know, "A picture is worth
a
thousand words." Pictures tell a story, and it is important to narrate that
story for those who will view your Memory Book years from now. On the first
page of your book add the names of relatives who are featured and the
important dates (birth, death, etc.) in their lives. A family tree diagram
listing relationship to you can be added also. Another idea would be to
interview family relatives and add their stories and pictures to your book.
Getting your children involved in this project would be a great way to
introduce them to the art of scrapbooking and at the same time aquaint them
with their family ancestors.
You can make your Memory Book as simple or elegant as you wish... your
creativity is unlimited and the results will be an everlasting treasure for
your family to cherish.
©Deborah K. Millemaci - 2002
No part of this article may be reproduced in any form without written permission from the author.